
With the sudden shift to virtual presentations at the start of last year with the pandemic, we were confronted with the sudden need to construct a high-quality home recording studio almost overnight, relying on an SM7B and DBX/Yahama audio chain to mitigate the horrendous acoustics of the recording facility, a Canon SL3 camera at 1080p60 recorded through an ATEM Pro Mini ISO and a large array of supporting infrastructure. The room housing all of this equipment was never designed with a recording studio in mind and already houses some highly heat sensitive equipment, requiring careful thermal management.
As part of the thermal design of our new facility, we used a medium-resolution 320×240 pixel microbolometer, also known as a thermal camera, to image the studio's components under various ambient and actively cooled conditions as we designed and fine-tuned the system. We thought some of these images and their insights into the internal thermal characteristics of some common studio equipment might be useful to others designing their own home recording studios under similar constraints.
Thermal cameras see the world through infrared radiation, meaning they display a room through its temperature, rather than ambient light. Since this temperature information is not naturally correlated with color, thermal cameras offer a range of false color scales. For the images below we used what is known as a "rainbow" scale since it is one of the easiest to understand when first learning about thermal imagery. Given that our focus was on general room-level thermal management and due to the sheer number of different surfaces and materials involved, we used a standard emissivity coefficient of e=0.95, which works well in the general case, though means some temperature readings will not be perfect in the images below.
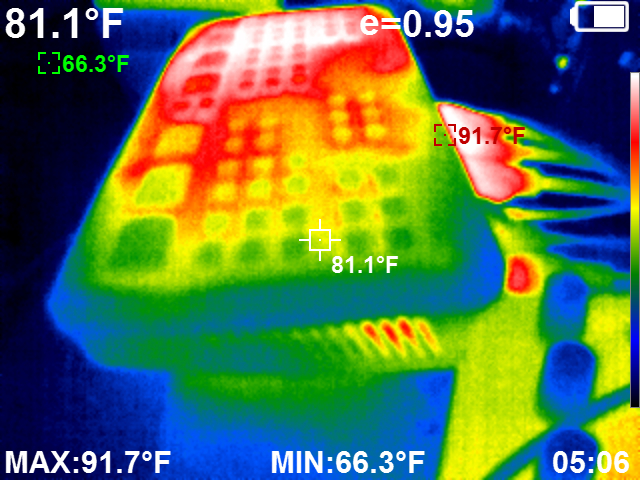
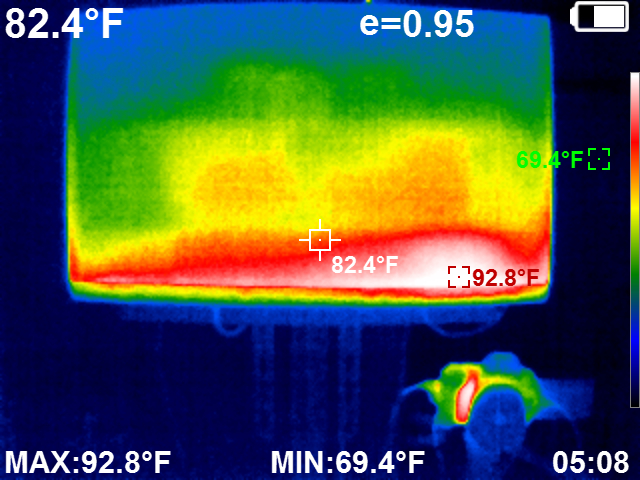
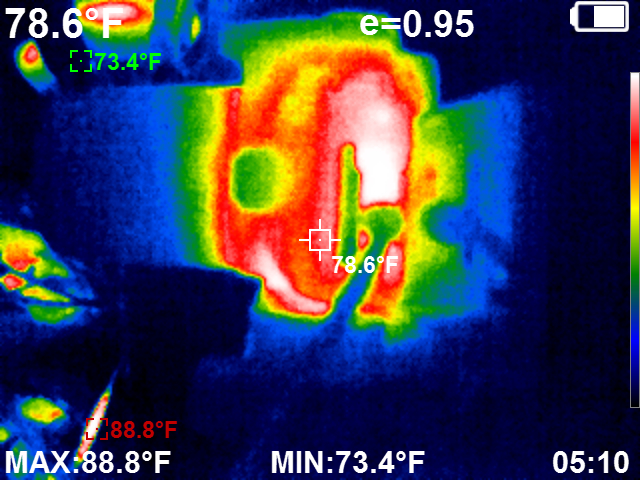
Below you can see a wide-angle thermogram of the recording station, showing the high-end Dell workstation with its three monitors in the front and all of the recording equipment arrayed around the console to the right.
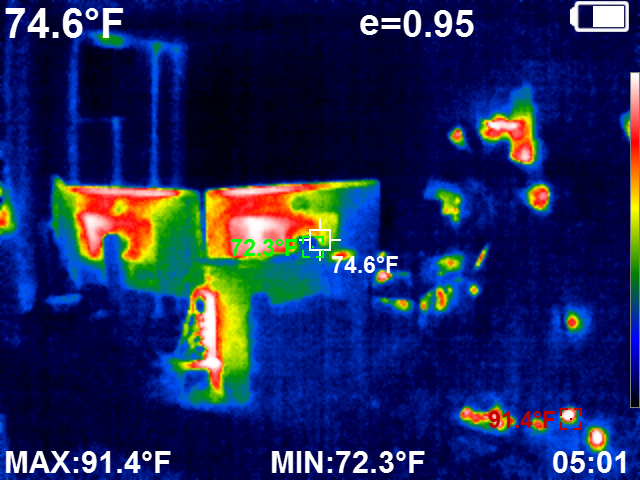
Look carefully at the top-left of the image and you can see faint vertical columns. Those are the metal drywall studs in the outer wall, reflecting the fact that it was so warm on the day this image was taken that the studs were hot enough to radiate heat through the drywall to the room interior.
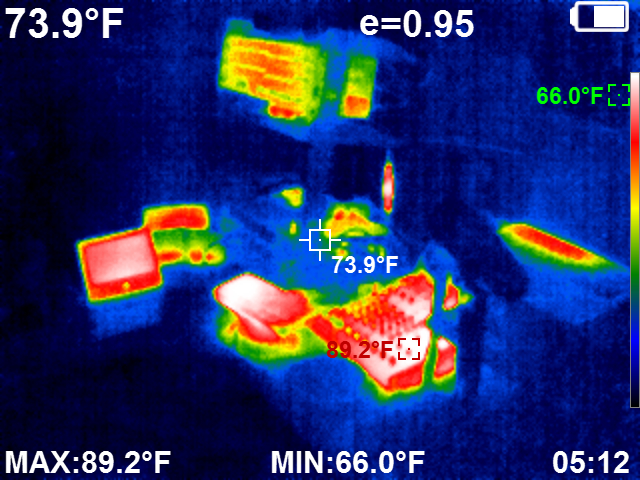
Here you can see the recording control station as it looks facing to the user's left. The Mac Air can be seen at middle-right, the DBX 231s and DBX 286s at top-left, the Elgato Cam Link 4K dangling in the middle, the Yahama ProFX10v3 at bottom center, the ATEM Mini Pro ISO to its left, the Clarity M and twin Ambient Weather 8-channel wireless thermal monitors to its left displaying realtime equipment status. Look carefully and you will see the faint outline of the Shure SM7B towards the front-right, showing it produces no measurable heat compared to this other equipment using this particular thermal imaging system.
ATEM Mini Pro ISO
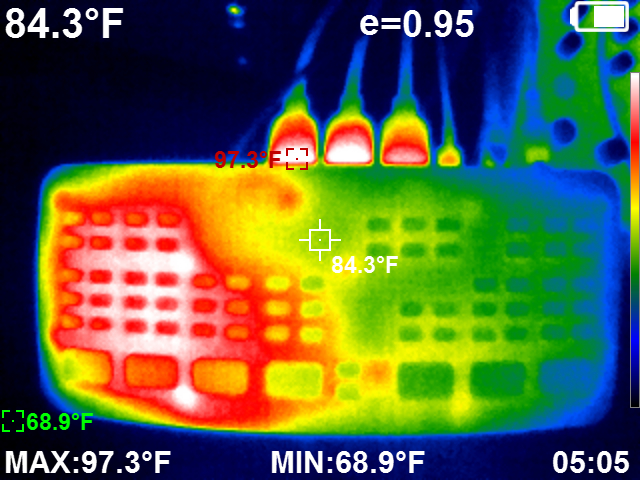
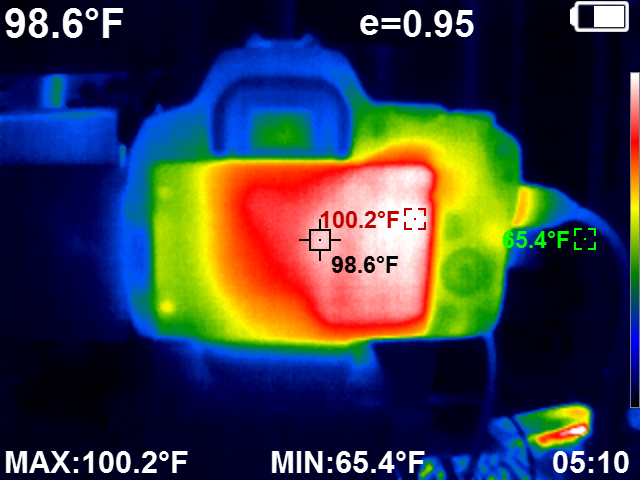
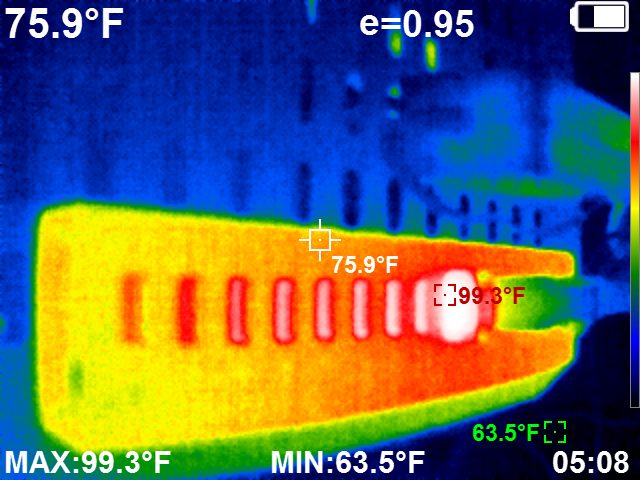
We use the ATEM Mini Pro ISO for all of our video recording at 1080p60. As the images below show, this unit dissipates a fair amount of heat.
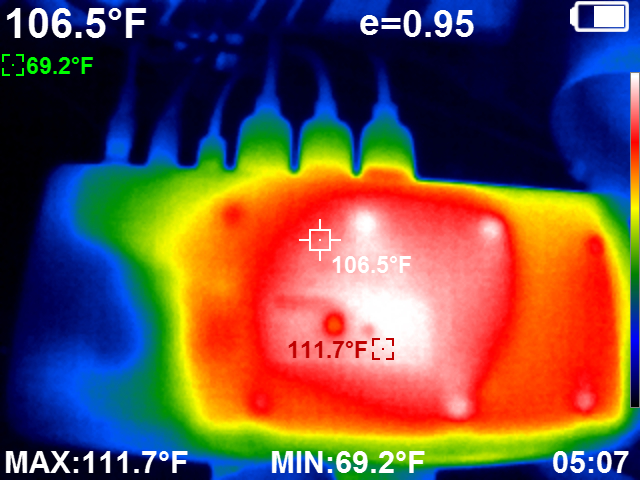
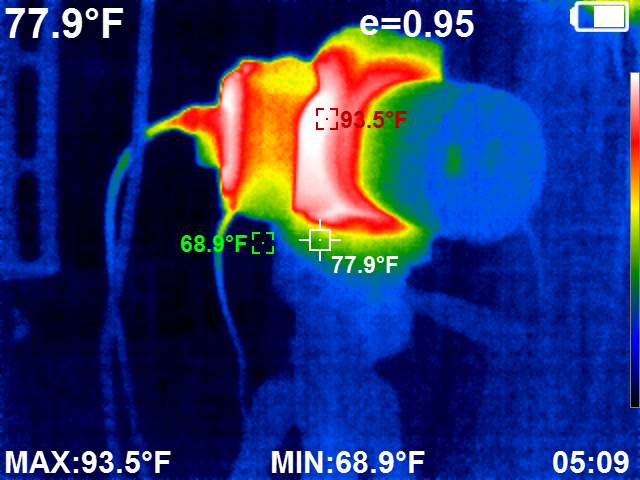
From the top view below, the ASIC is clearly located at the center-left of the unit beside its exhaust fan, while the right side of the unit is much cooler. Yet, the hottest point on the unit looking from above is actually on the HDMI connectors, which are running at around 97F, indicating that the unit uses its connectors as heatsinks.
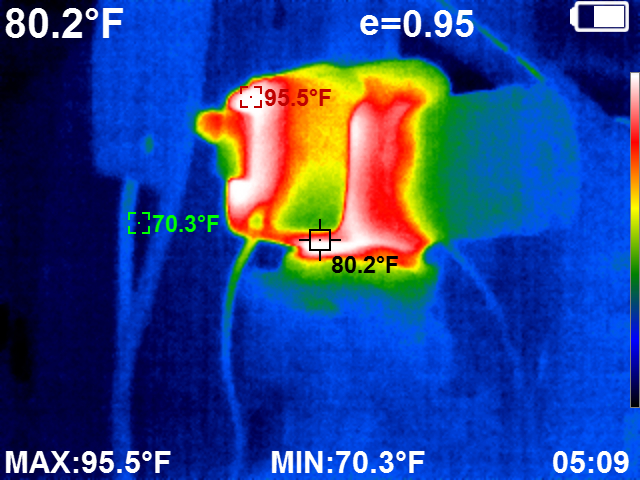
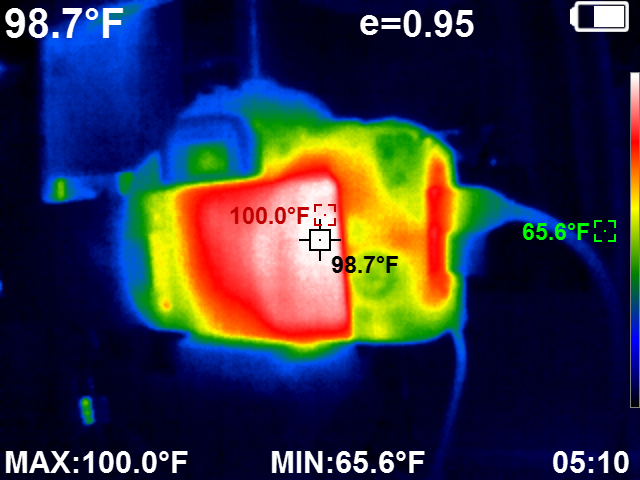
This image is is taken back of the unit facing forward, showing that the entire back panel of the unit sheds considerable heat.
From the right looking to the left we can see this heat distribution more clearly.
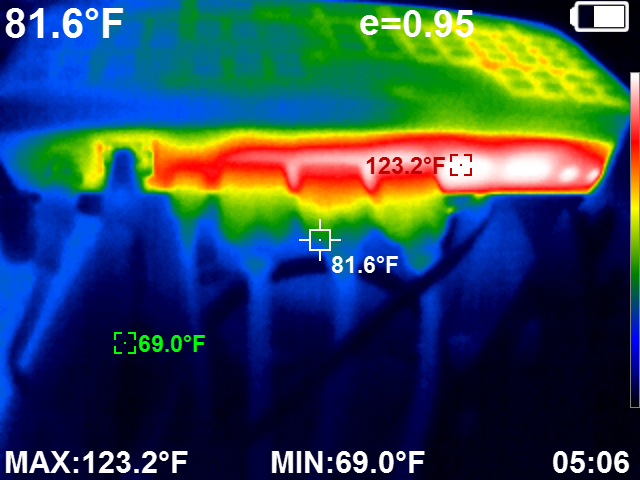
Zooming into the left-hand exhaust vent, we can see that the internal unit temperatures are fairly high.
Looking up from underneath the unit we can see substantial heat dissipation through the bottom of the case. In this case the unit sits elevated to permit airflow around the case, but from the images below it is clear that the current suspension mechanism is obstructing some airflow towards the center of the case.
Yamaha ProFX10v3
For sound mixing we use a Yamaha ProFX10v3. You can see from the top-down image below that the greatest area of heat is in the center-right of the unit.

You can see how this compares with the ATEM unit sitting beside it.

Elgato Cam Link 4K
To connect our camera signal to our laptop, we have a hardware downscaler that converts the camera's native 1080p60 signal to 720p30 given the limitations of most video conferencing software (the original 1080p60 signal is fed via a duplicator to the ATEM unit for recording). In this case the unit is suspended in the air for maximal air flow. Like the ATEM unit, it sheds heat through its HDMI connectors.

DBX 231s/286s & Video Scaler/Duplicators
The SM7B microphone is connected via a Cloudlifter CL-1 into a DBX 286s for signal processing, including compression and noise gating. A DBX 231s is used to subtly shape this sound to eliminate several external ambient noise sources and mitigate some of the room acoustics, with one equalizer used inline in the 286s before signal processing and one inline in the Yamaha post-processing. You can see the two units in the image below, with the 231s on top and the 286s below it. The 286s unsurprisingly runs hotter due to its greater number of active components.
On the shelf beneath the DBX units you can see the video processing units, two HDMI duplicators and an HDMI hardware downscaler. Since the Intel-based 2019 Mac Air is unable to robustly process video content higher than 720p30 (QuickTime can record 1080p30 but with frame loss and without the ability to run other video conferencing applications simultaneously without significant lag and instability – browser-based video is especially unstable with severe bitrate reduction), we have to downgrade the 1080p60 signal from our EOS SL3 camera. The first HDMI duplicator copies the camera's native 1080p60 signal, providing one copy to the ATEM unit for recording and sending the second copy to the downscaler. The downscaler unit then converts the signal to 720p30 and feeds into the second duplicator, which makes one copy to feed into the Cam Link 4K for the Mac Air and a second copy for secondary recording if needed for special applications. Like most video equipment, these run hotter than the audio equipment.

Below you can see a side profile of the two DBX units. Of interest, this image clearly captures the diffuse heat shedding of the 286s on the bottom, which radiates heat throughout its casing, while the 231s above it has a relatively cool case, but you can see internally there is a moderate level of heat production visible through the vent slats.

Clarity M
For sound monitoring we use a Clarity M. Its solid metal construction is suggestive of substantial heat management requirements, yet the unit runs surprisingly cool despite having run for several hours in RTA mode.

HP24mh 1080p Preview Monitor
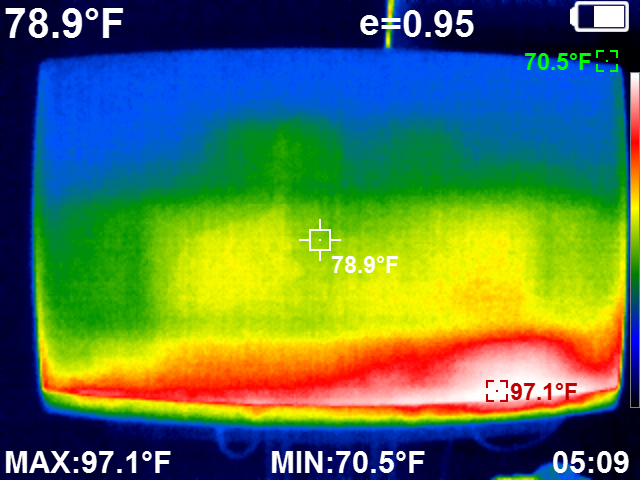
For recording monitoring, an HP24mh 1080p preview monitor is connected to the ATEM's output. Here the bottom of the unit runs the hottest, especially the bottom right.
Here another image shows the monitor alongside the Canon EOS SL3 camera.
Canon EOS SL3 DSLR Camera
For recording, we use a Canon EOS SL3 DSLR camera in 1080p60 "clean HDMI" mode. The camera itself is used in passthrough mode, meaning it is simply generating an HDMI signal and is not performing any onboard recording.
USB Hub
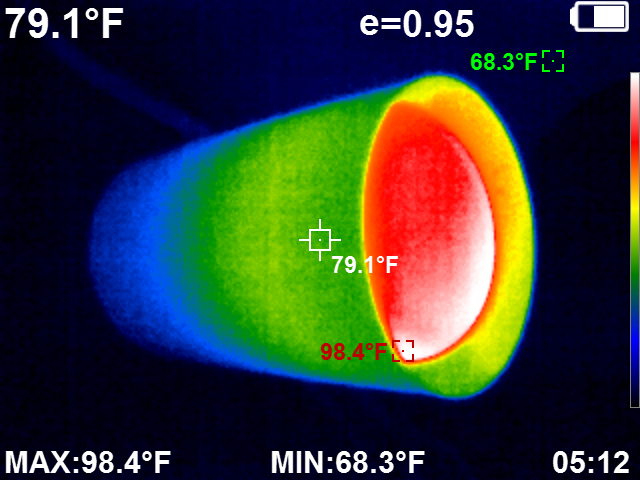
To connect all of this equipment to the Mac Air, we use a powered USB hub. You can see how hot these units can run. The hotspot at 98.4F represents a mini USB thumbdrive inserted into the hub, reflecting how hot those units can become.
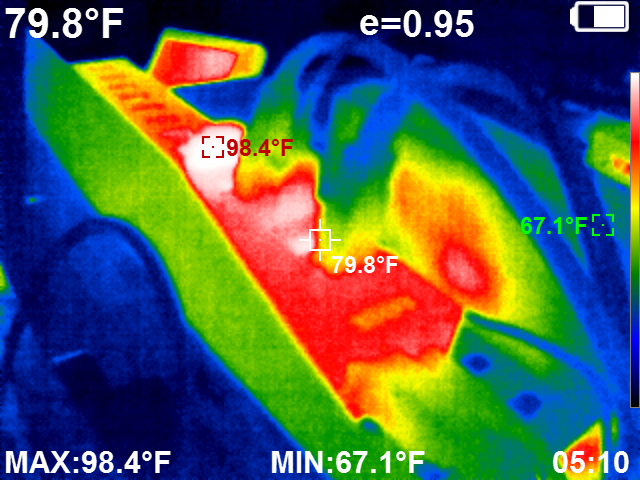
Here you can see another angle of it.
Mac Air
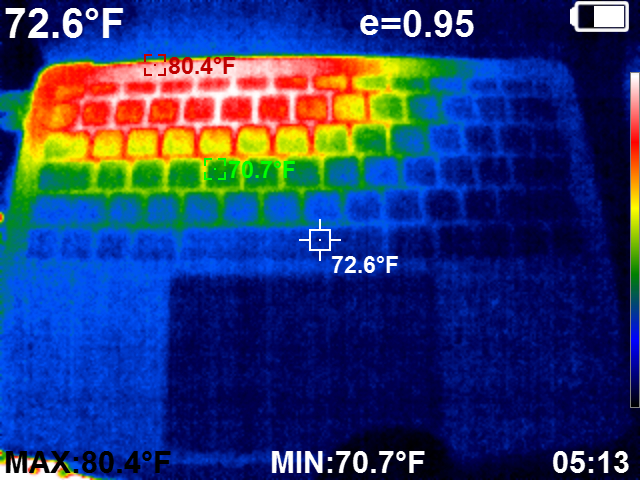
We use a Mac Air for video conferencing and to provide the computer signal (PowerPoint/browser/etc) for video recordings. Here you can see the Mac Air after several hours of being plugged in and turned off with a 100% charged battery, illustrating that it still generates heat keeping the battery maintained.
Box Fans
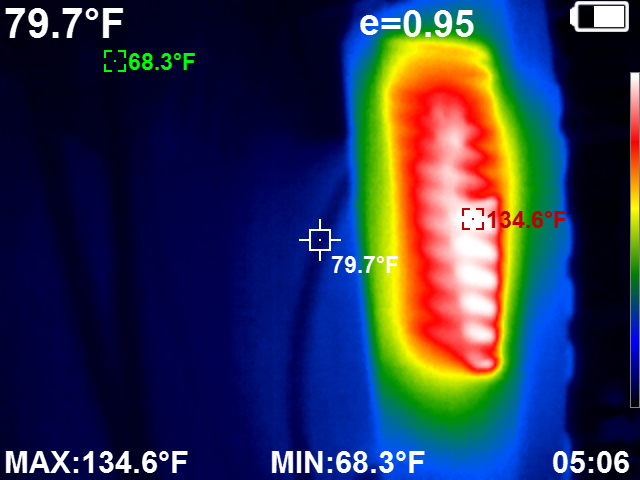
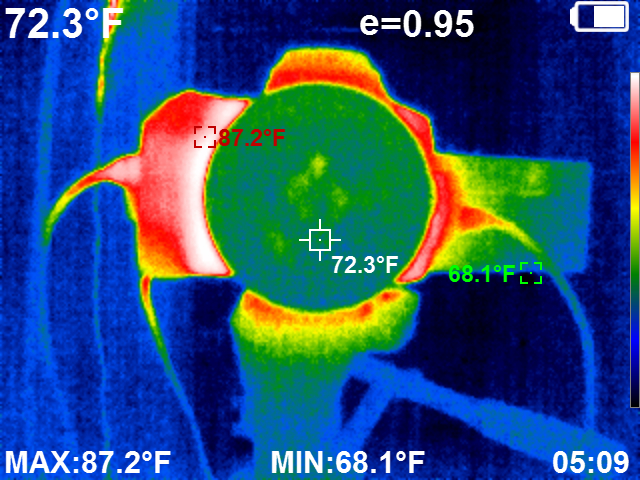
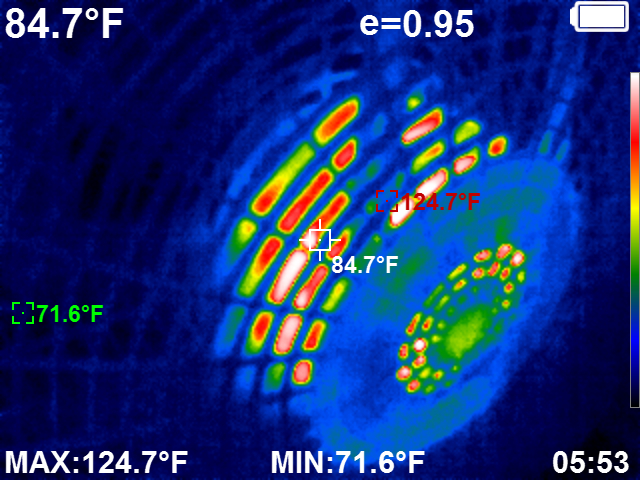
Despite maintaining a cool ambient temperature, we use a collection of HEPA systems and fans to clean and circulate air. Here is a look at a typical box fan motor, showing the considerable internal temperatures inside many fan motors.
LED Lighting
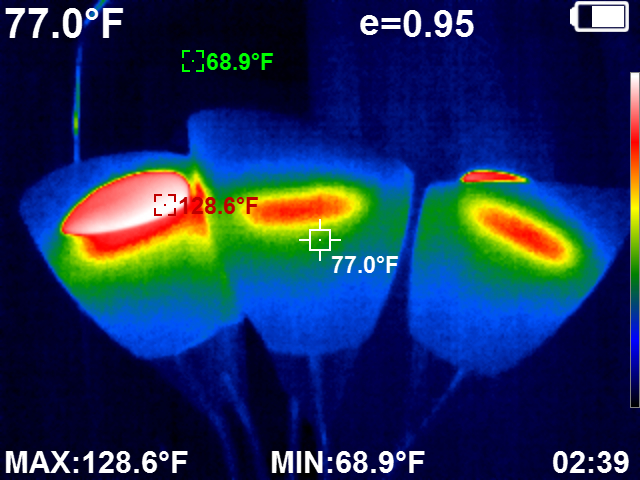
In addition to our professional videography lighting, we also use a large number of ordinary 75W equivalent LED floodlight bulbs mounted in floor uplights and floor-standing medusa lamps in a mixture of 5600K, 6000K and 6500K temperatures for background ambient fill. Despite LED bulbs being known for their cooler temperatures, they can still run extremely hot.

Clock
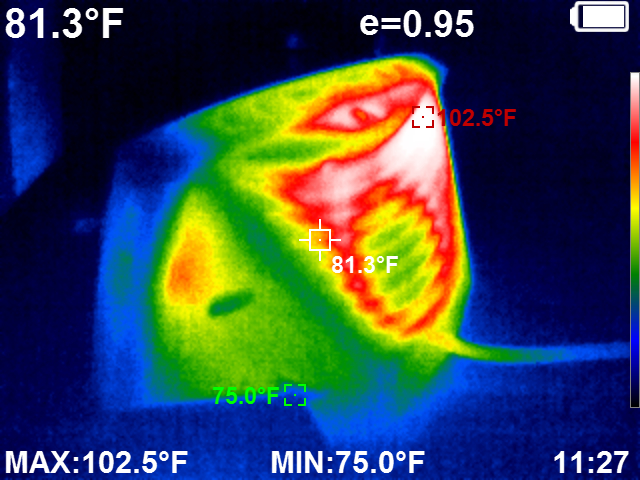
Its worth noting that even the most innocuous devices can generate a surprising amount of heat. Below you can see the rear of a basic off-the-shelf LED clock used to track current time, showing that its rear panel is 102.5F.
We hope this has given you a new perspective on the hidden world of temperature!